|
Here we are again... Shop Cla- I mean, Sculpture Class. More specifically Sculpture 2. Our first project is to design and construct a lamp using sheet metal and welding techniques to play with light and shadow. Below are some select lamps that I loved the aesthetics and the lighting effects to help me come up some designs of my own.
0 Comments
 I was all over the place for the plans for the box portion of this project. I was initially going to go with something similar to some light boxes I had made back in the spring. I opted to go with a design I had scribbled on some scrap paper that was loosely based on my toolbox from Project 2 with the angled sides. There's a lot of sanding that needs to be done for the sides for my box, but I'm confident in getting the final angles for everything to fit together just right. There was a lot of recutting pieces due to me not double-checking my cuts. Finally a peak at the brass hinges and the redrawn design that's going on the box.
 Our final project in my Sculpture 1 class is to make a functional belt buckle and a wooden box to hold it. Above, are a few of my designs that I had sketched out for my buckle including the buckle shape and the pieces that go on top. To test out if the designs would work out in metal, we were instructed to cut out our designs out of cardboard. The idea is that if the design can be cut out of cardboard, then it can be cut out of metal. I finally opted for a circular design based on some confetti I had picked up off of the ground. The design itself is based off of an icon/logo I had made for a project I've been working on over the past year. 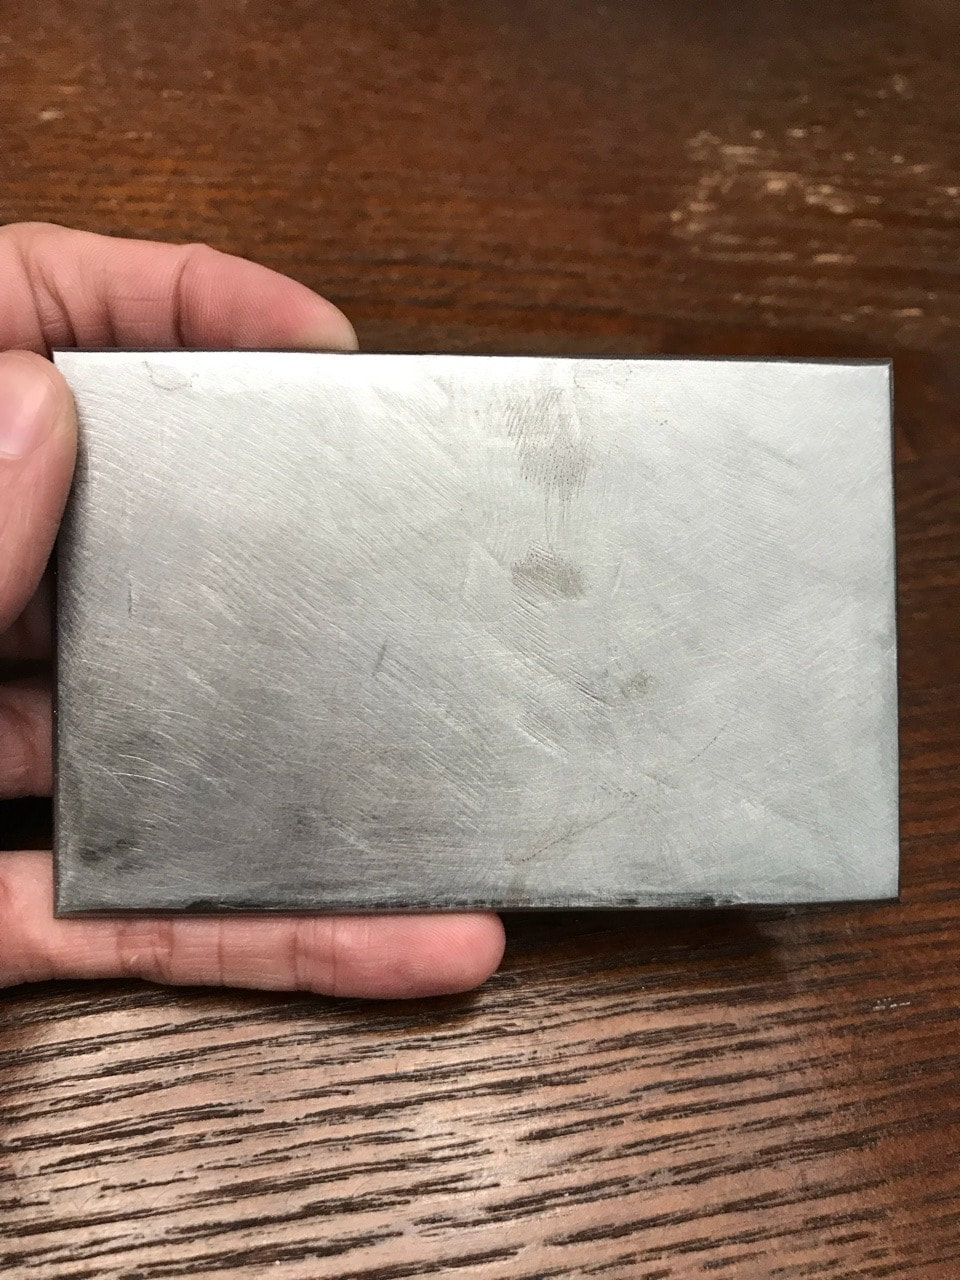 Finally is the metal plate that I've cut for the base of my buckle. I still need to on buffing out the scratches and divots before polishing. That or I could always cut the other piece of metal I have left over and use this piece for practice.
I was definitely a bad noodle in making sure my website was updated for the trophy project for class. My bad, everyone. To make up for it here's a dump of all of my WIP images for the project as I continue to update the page for the final product.
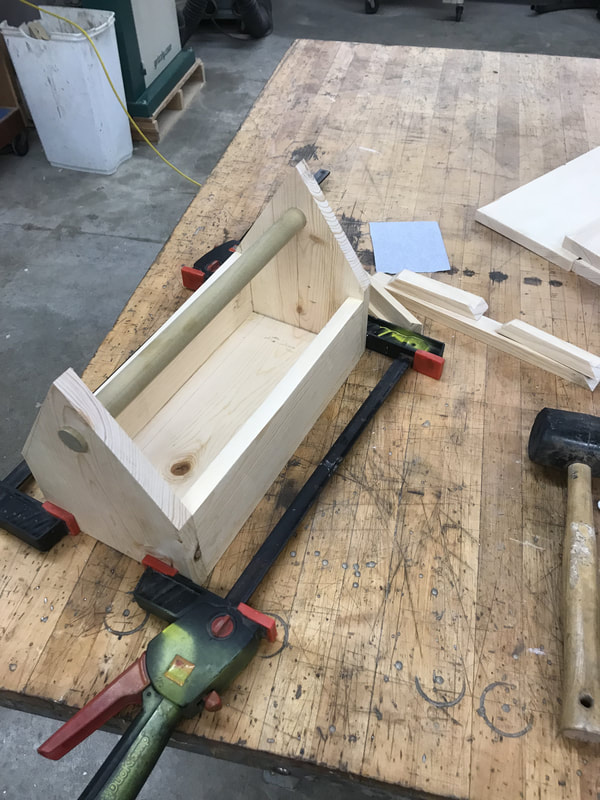
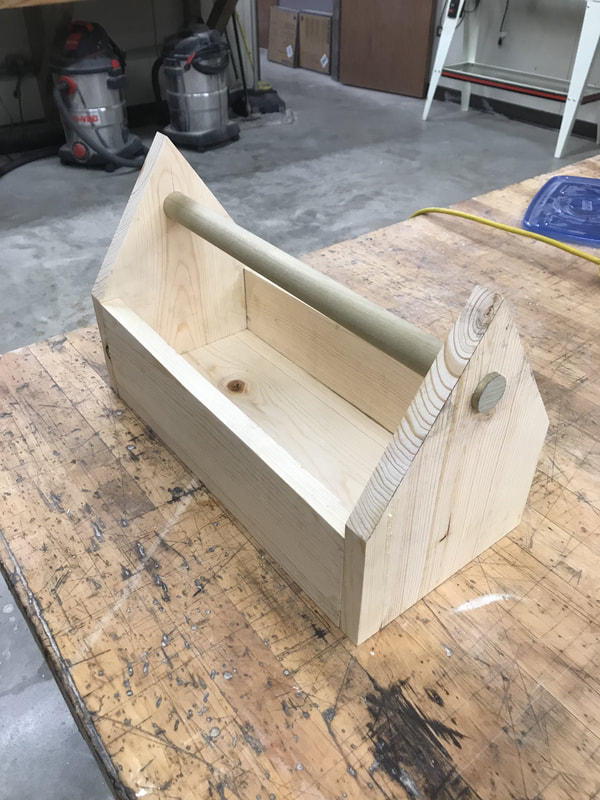 Thanks to a class cancellation, I was able to go to the wood shop Monday and glue my toolbox together. For now I just have a lot of sanding to go before I'm ready to stain my box, but that will have to wait until Wednesday since my dog had a vet appointment that couldn't be rescheduled. On a bonus note, here's a little bit of my adventures and struggle in clamping wood together:
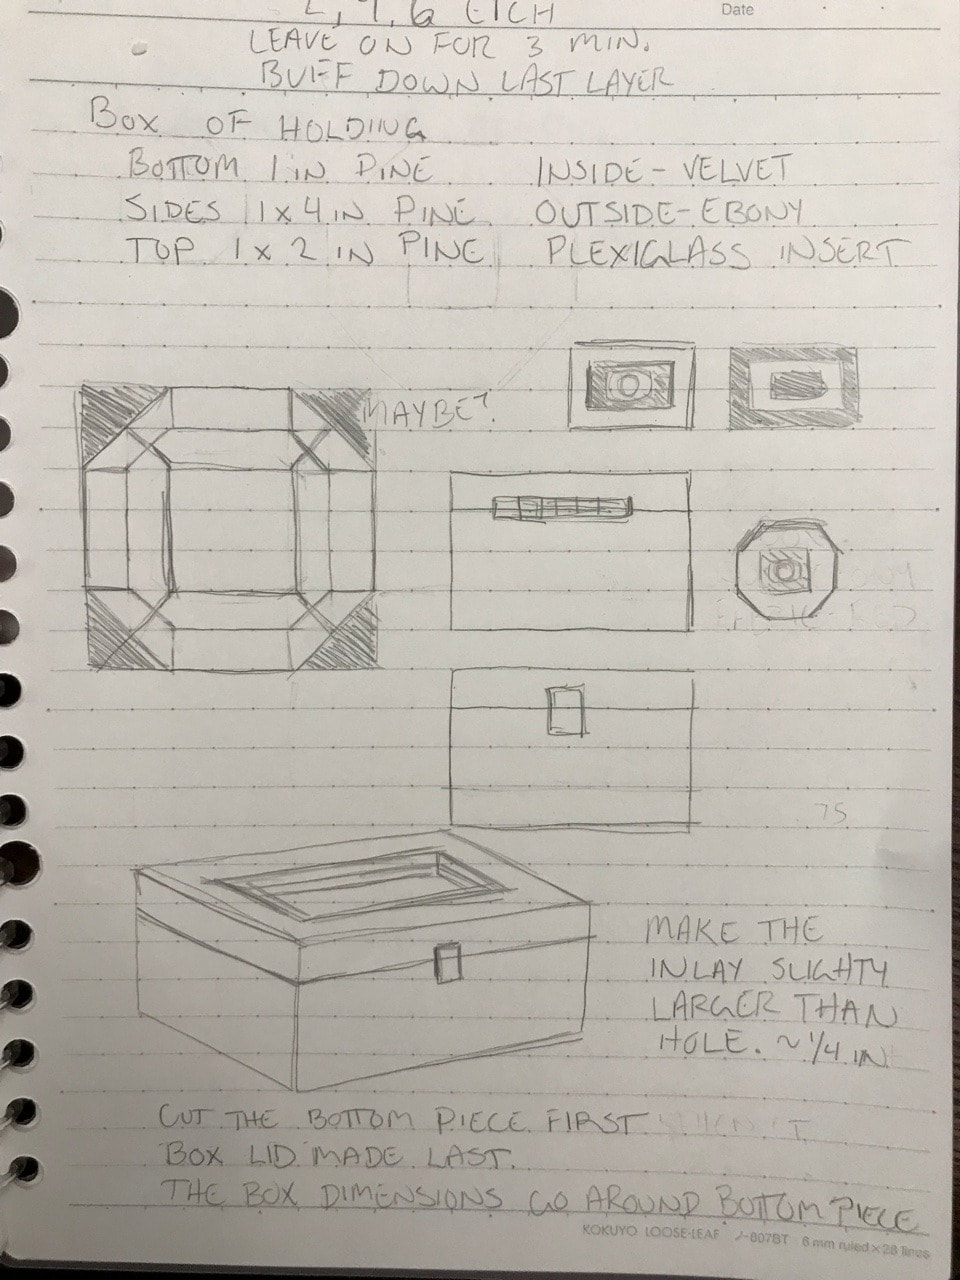
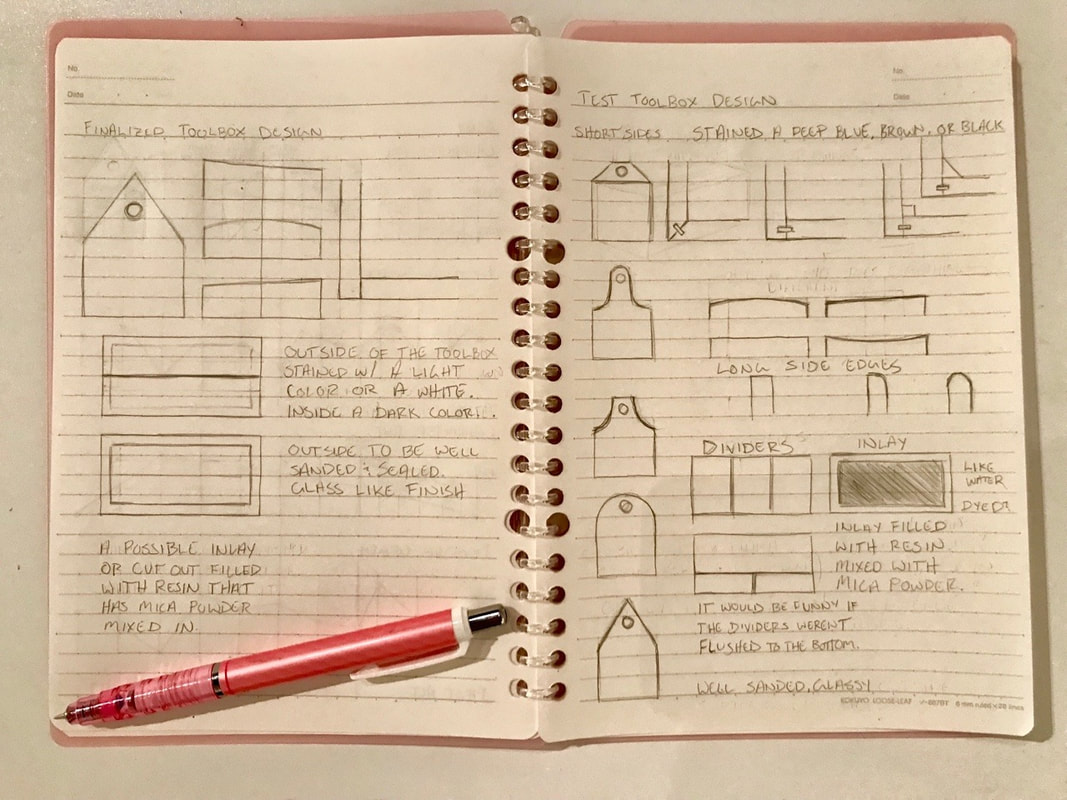 Fun Fact: There are A LOT of notes for Joys on the previous pages. In my Sculpture I class, our second project is to make a functional toolbox that is also a nonliteral self portrait of sorts. My initial note taking and design ideas (right) are always pretty scattered and set up in a way to where I can mix and mash ideas as I go rather than settling on one thing for each toolbox sketch. My final design and notes (left) are where I finally figured out what ideas work with what. There are some things, the resin inlay and finishes, that I'm still working the kinks out on. Overall, I'm pretty confident in the direction the design is going. 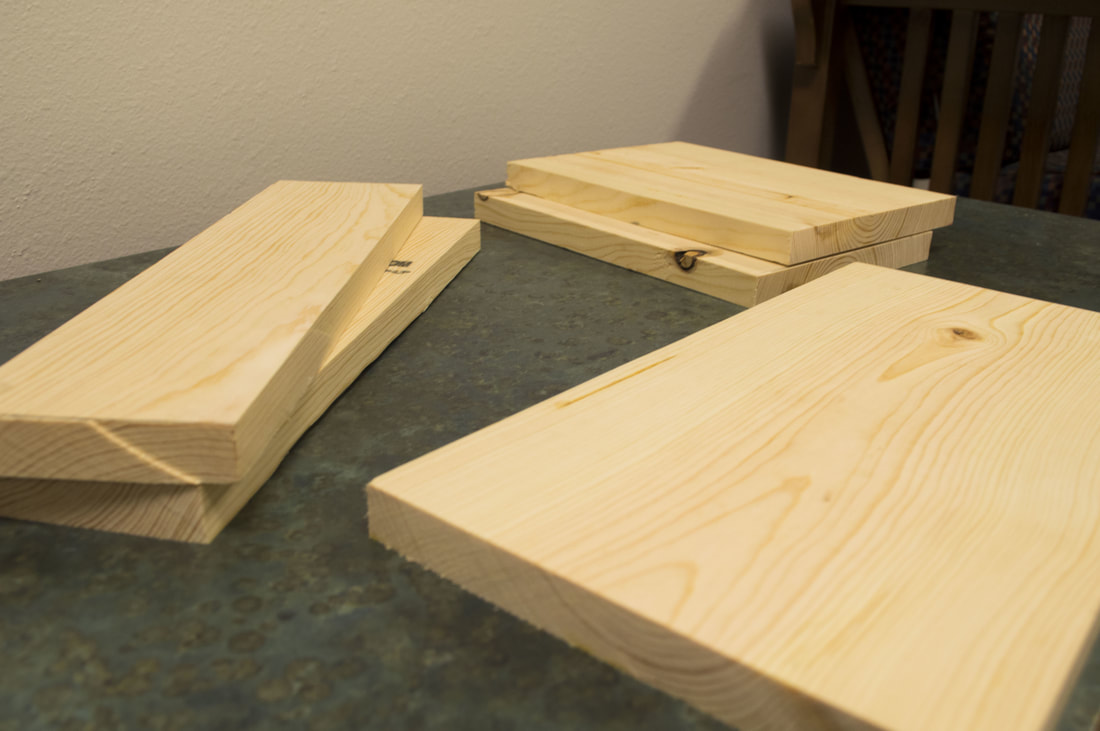 AND here's the honorary pile of wood that I promise has much more to it than what's shown.
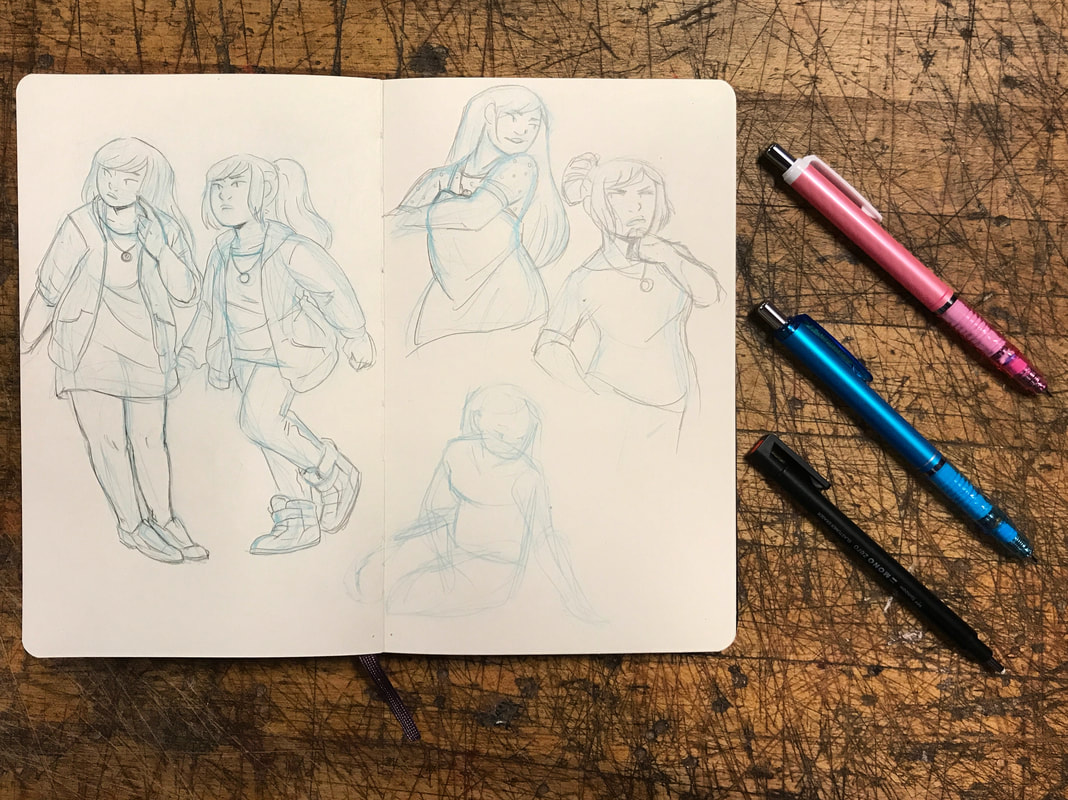 Some doodles of one of the main characters for my baby project, Joys. I'm hoping to have the project up and running by next year.
  I had struggled a lot on this when I had originally painted this. I felt that I wasn't doing my concept any justice and the paint just kept kicking back at me hard. I finally decided to kick back and repaint with a fresher mind.
 I'm sure there's someone off in the distance hollering about people who draw nice things on newsprint.
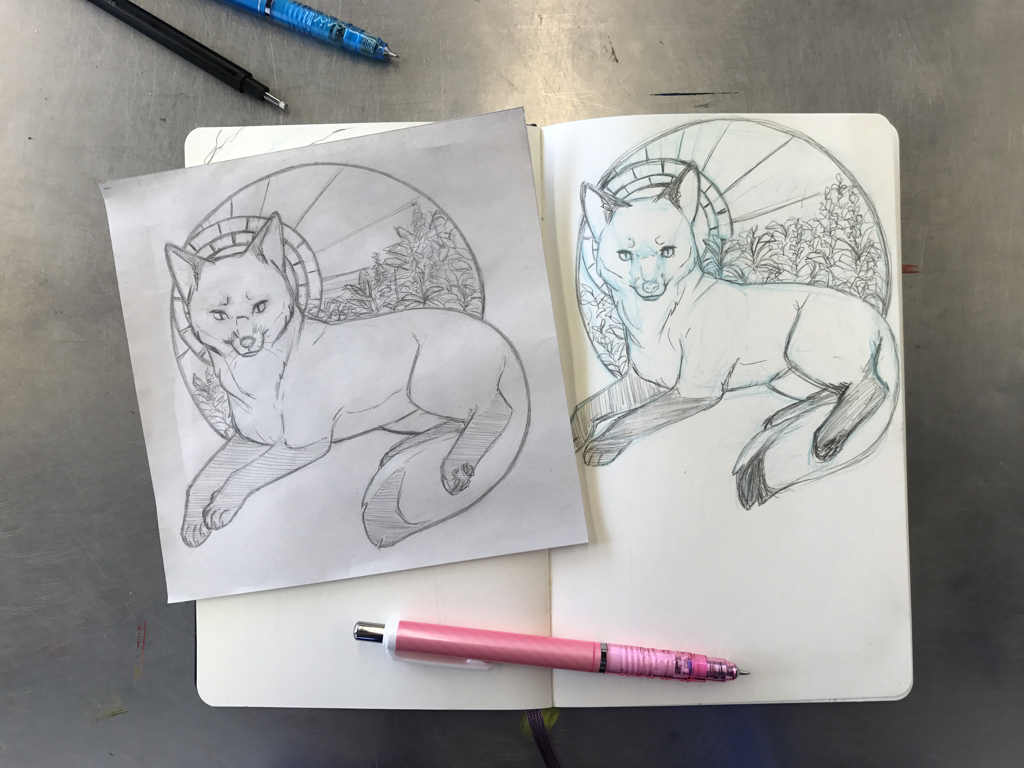
I'm hoping to do a couple of intaglio pieces before the end of the year starting off with this fox. I haven't really bothered with the process since 2014 because wiping down plates is a worse fate than working on litho stones. |
S.L. SpauldingSketches & W.I.P.s Categories
All
Archives
April 2018
|


 RSS Feed
